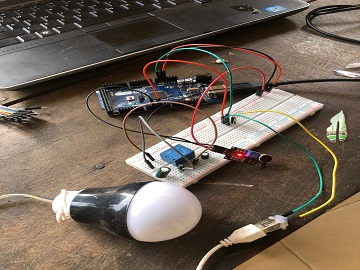
Control LED By Clap Using Arduino and Sound Sensor
LM393 Sound Detection Sensor Module

Sound detection sensor module detects the intensity of sound where sound is detected via a microphone and fed into an LM393 op-amp. It comprises an onboard potentiometer to adjust the setpoint for sound level.
Sound Detection Sensor Module Pin Configuration
| Pin Name | Description |
| VCC |
The Vcc pin powers the module, typically with +5V |
| GND | Power Supply Ground |
| DO | Digital Output Pin. Directly connected to digital pin of Microcontroller |
| AO | Analog Output Pin. Directly connected to an analog pin of Microcontroller |
Sound Detection Sensor Module Features & Specifications
- Operating Voltage: 3.3V to 5V DC
- LM393 comparator with threshold preset
- PCB Size: 3.4cm * 1.6cm
- Induction distance: 0.5 Meter
- Operating current: 4~5 mA
- Microphone Sensitivity (1kHz): 52 to 48 dB
- Easy to use with Microcontrollers or even with normal Digital/Analog IC
- Small, cheap and easily available
Components and supplies
 |
|
× | 1 | |||
 |
|
× | 1 | |||
 |
|
× | 1 | |||
 |
|
× | 5 | |||
 |
|
× | 1 | |||
 |
|
× | 1 |
About this project
This video shows how to use LM393 Sound Detection Sensor using Arduino. It also shows how you can control LED by clap with the help of Arduino and Sound Sensor. We have shown only to control LED, but by using the same concept you can control any electronic device.
LM393 Sound Detection Sensor Sound Sensor having 4 Pins:
- AO – Analog Output
- G – Ground
- + – VCC
- DO – Digital Output
Schematics Circuit Design

Watch How It Works
Source Code
int soundSensor=2;
int LED=4;
boolean LEDStatus=false;

void setup() {
 pinMode(soundSensor,INPUT);
 pinMode(LED,OUTPUT);

}

void loop() {

  int SensorData=digitalRead(soundSensor);
  if(SensorData==1){

    if(LEDStatus==false){
        LEDStatus=true;
        digitalWrite(LED,HIGH);
    }
    else{
        LEDStatus=false;
        digitalWrite(LED,LOW);
    }
  }
 }
![]()
